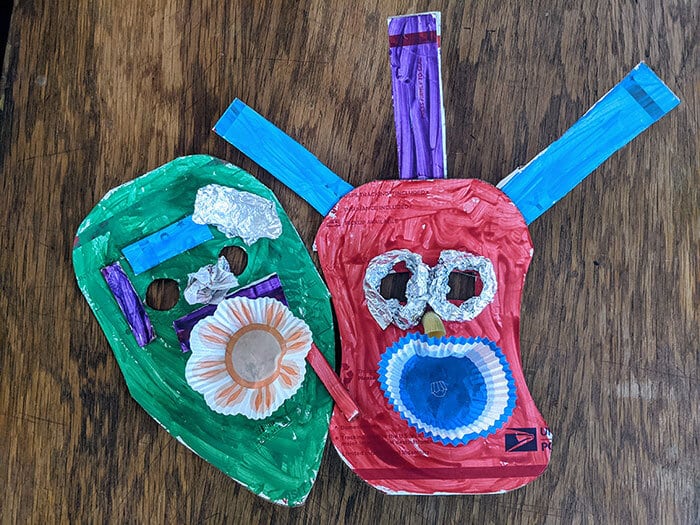
Wearing a mask allows us to transform into someone else and express our creativity in a fun way! It’s a universal art shared worldwide, throughout human history. To inspire your art, check out this collection of Masks of the World from the Wake Forest Museum of Anthropology.
Materials
• Cardboard boxes (cereal, pasta, shipping, etc.)
• Paint, markers, crayons, etc.
• Scissors
• Glue
• Decorations (construction paper, cupcake liners, stickers, magazines, foil, etc.)
• Something to attach the mask to your head (elastic, yarn, string, etc.)
Steps:
- Create Your Mask Base: Draw the outline of your mask and cut it out. Hold it up to your face and mark where the eye holes should be. Cut out the eyes.
- Decorate the Mask: How do you want to add color and decoration to your mask? This can start with paint, markers, or crayons. Add texture and pattern by gluing on additional items. You can use different colors cardboard shapes, cut out magazine pictures, stickers, or something totally different and unique!
- Let it Dry
- Try it On! Create a headband by knotting some elastic, string, or yarn through the eye holes. Show off your creation to family and friends. Use the hashtag #RASatHome.
Share with #RASatHome
Facebook
Twitter
LinkedIn
Did You Know?
Masks are a universal art shared worldwide, throughout human history!